As we saw when I was stretching the 4Runner out to see where the new tires hit, my truck exhibits very low levels of flexibility in it current configuration.
With open differentials, keeping both the left and right tires on the ground makes an enormous difference to how far you can make it offroad. Open differentails provide power to the tire with the LEAST amount of traction (e.g., the one in the air spins, the one on the ground does nothing)
To the right is my truck, fully stock except with larger tires, fully flexed out.
The red box shows the truck is relatively level, but down in front a couple inches. The blue line shows what the height difference from the bottom of the front tire to the bottom of the rear tire. If the truck were fully level, that means it only has about 14-16" (the wheel is 16" in diameter) difference from front stuff to rear droop. I didn't bother with the other pics and doing the math, this was depressing enough. LOL
Left to right flex in the front was definitely nothing to write home about either. It's a few inchest at most.
The rear did a lot better.
Compare the pictures above to my Blazer at its pinnacle, from a suspension perspective, with 32" tires. Huge flex. It's not even fully stretched out yet and can do better. The top of the rear tire would be almost even with the bottom of the front tire at full flex. That's around a 32" differential. Much better than what the 4runner is seeing now. This is one reason solid axles are a frequent conversion option for IFS trucks.
Here's my Blazer on 36s in a similar situation to the one the 4Runner is pictured in at the begining of this post. Same suspension setup as the Blazer pic above, just bigger tires. The sway bar is connected. Any further up the rock and the right front tire started to come off the ground. This is how good it was in street trim. :-D
Obviously we can't leave the 4Runner like it is! Off to Google to learn more about what this truck can really do! Here's a great thread showing various YotaTech IFS trucks' capabilities when it comes to flex. Some are stock, some are modified
To improve offroad articulation, disconnecting the sway bar is the first change to make, and can yield substantial results. Offroad.com has a good overview of the parts we're talking about.
Sway bars work by keeping both tires relatively level, from side to side. As one side gets compressed in a corner, the sway bar pulls up on the other side. There's an awful lot more to engineering a good handling car than that but, in rough terms, is how a sway bar works.
While my passenger tire in the pic above is stuffed in the fender, it's not quite as far as it can go. And it's pulling the driver's side tire up via the sway bar. And the driver's side tire is pulling the passenger tire down. Great in a corner, not great offroad when crossing uneven terrain.
With the swaybar disconnected, my driver's front will droop lower, and the passenger front will stuff up even more (which, I'm sure, means more tire clearancing activities as we take this step).
A surprising number of folks recommend removing a swaybar entirely. That's really not recommended and I would hate to be in an accident and have that come up as a possible reason. I need a vehicle to handle well on pavement at all times. My car is a BMW M3 and it is just flat out phenomonal on curvy roads. While I don't expect similar performance from an SUV, it is important that it is above all else safe for any of my family members to drive. Predictability is a critical component of "safe".
So... the swaybar stays. And, given its current road-handling manners, the truck probably will get a beefier front and a rear sway bar added at some point since current handling still leaves a bit to be desired.
Edit May 9, 2011 - added highway noise videos to bottom
---
Given the 4Runner would be used offroad on a regular basis, I wanted to get an aggressive tire. I've always loved my BFG MTs, but that tread pattern is no longer available. The Goodyear MT/R has also been quite interesting.
About 4 months ago, I scored some 2010 4Runner takeoff wheels and tires (245/75R16 Dunlop AT20) from the local Toyota dealer. Wheels, tires, lug nuts, center caps.
As you can imagine, a tire that looks like this really doesn't turn out to be exactly good offroad. :)
I've already racked up 800 miles on these tires. And chopped a 2" gash through the inside cords of the RF tire playing Ivan "Iron Man" Stewart on my way home from an offroad trip (we were late for SuperCross). I smacked a rock at speed, bending the steel rim. I still can't fathom which rock. :) It still holds air, and it got me home (slowly!!), but the bubble extends from the tread to the rim. It's non-repairable. The wheel banged out quite easily.
Unfortunately, somewhere along the way, truck tire prices have gone stratospheric. 10 years ago, I could buy a 265/75R16 Bridgestone Dueler H/T for about $70 or less. The same tire today is over $200. And that's just a road tire.
My daily driver is a BMW K1200S motorcycle. The rear tire is a 190/50R17, speed rated to 186mph. It's the size of a car tire. It has an immense amount of technology in it (compared to even just 10 years ago, this tire is better in every conceivable way). I run Michelin Pilot Sport IIs, which are both a premium tire, and dual compound. Yet, it somehow "only" costs $136 for a rear tire.
All other tires prices have gone up. Offroad tire prices have gone stratospheric.
The 285/75R16 Goodyear MT/R has a best internet price of around $238/tire, the BFG KM2, in the $220 range. Plus shipping in many cases ($65 to $220 for four).
For 4 Goodyears, I came up with about $1070 for 4 tires, delivered to my door, ore over $1200 locally (installed).
Try as I might, I was unable to find a prices I was comfortable with for what is, arguably, mostly a toy.
But then I found TreadWright. I was able to get four 285s for under $600 delivered to my door, on sale (about $12/tire less).
Long ago, I learned that spending extra for a good product is nearly always the better investment. I've had particle board. I've had real wood. My Bentwood bedroom set was fanstatic and looked as good more than 10 years after we bought it as the day it came home with us. I still miss my nightstands.
The other is that no matter how good the product, it may have issues. How the company backs their products is just as important. One of the benefits of the internet age is you can find out how a product/company is treating their customers.
I found almost no issues with TreadWright products, and the one or two I found were related to tread chunking. TreadWright sent one guy a whole set of tires because one tire had a problem. As you can imagine, he was an avid fan.
But I wasn't able to find anyone I knew who had run a set, or someone they knew personally who had run a set.
For ~$500 in savings with few findable issues and what appeared to be great customer service, I went ahead and ordered up a set of 285/75R16 TreadWright Guard Dog M/T tires for the 4Runner. They were on backorder, so I had to call them to order. I ordered Goodyear casings since I wanted to try them. I wasn't in a rush, I had great tires and my list of lift parts wasn't complete yet.
After a few weeks, they called me and let me know my tires were next up, but Goodyear casings were hard to come by - did I want BFG casings instead? Since I was mounting these black side out, I didn't really care, so I agreed.
Before, 225/75R15 stock wheels and tires (the rears are Nittos and were old enough to be originals!)
After. Man, they look good.
With no lift, they fit. Sorta. :) Here's the driver's rear at full stuff. It's just touching the bolts that hold the rear mudflaps on.
The LF hits the back of the fender when turned 1/2 way to the left and with any bump. Since the metal wasn't going to cut the tire, and wasn't well supported, I let it self-clearance.
The RF just touches the back of the fender.
Pics as I figure out how to resolve this.
Here are a few more pictures of the 4Runner in action.
As you can see, I was eager to try them out. The old tires are still in the back, we didn't even make it home. :)
Check out how they sound on the road!
Couple of videos. #2 has me speaking in a normal voice for reference.
At this point, I have about 250 miles on 'em and I am quite pleased.
Like all buildups, these things ebb and flow. I've been in an ebb, mostly because of work constraints.
The first challenge of building a 4x4 is where to start. I find that building for the terrain you'll run most of the time seems to be the best approach.
We did the Pinyon Canyon run last weekend, and I learned a lot about the terrain out here and what I wanted.
The 4Runner did as well, fully aired up, as a 2010 Wrangler did aired down. But it was far less capable than my last two trucks. As it should be, it's stock!
I've been researching what to do for lift on the truck. I want 37s badly. But, it turns out, not badly enough to do a SAS (Solid [front] Axle Swap). In researching options, I ran across 4Wheel Underground's bracket kit for a 3-link front end. It looks very interesting and if I was doing a SAS, I think that's what I'd go with. The guys at FROR/Diamond turned me onto them.
After doing a bit more research, I decided I really wanted to try the LT IFS route. I have a feeling I'll tub the fronts fenderwells at some point so I can run 35s. But that's a ways away, and quite a few $$ too. While AxleIke runs 35s on Morph with just a balljoint lift (it's also had some serious surgery), I don't expect to be able to use the same tricks in a long travel implementation.
To solve my long travel angst, I priced out the Total Chaos and the JD Fabrication setups. Both very cool. Both a bit pricey for my budget right now.
Another option is the Blazeland kit. It's been getting good reviews, and I figure it probably compares well to the TC balljoint kit - but at a much lower price.
Last week, I bit the bullet and picked up a set of Blazeland arms and Sway Away torsion bars. $400 for OE balljoints makes this lift a bit pricier, but still cheaper than the other options by a lot.
I was also trying to figure out what to do with the rear. Blocks are out if at all possible. And if I'm going to spend some real $$, then I want the Deavers. Except I need to spend that $$ elsewhere right now.
Then I remembered the ZUK spring mod. Zuk turned me onto this thread where the fellow replaces his 4" lift blocks and maintains his 4" lifted height. While he still doesn't sit level, the important part is he replaced 4" lift blocks with springs and actually gained 1/2", and the ride got a heck of a lot better.
Now all that's left is to order shocks and brake lines - and figure out what to do with the LSPV valve (rear braking load adjusting valve. See thread above for his experience with this important valve).
All that was left was tires. And man, are they ever expensive nowadays! Which led me to Treadwright and their 285/75R16 Guard Dog M/T, a Goodyear MT/R clone. Sorta. They retread tires, and I can specify what brand casing I want (not necessarily the model, however).
I was not able to find any bad reviews for the tire. For the $$, compared to new, I couldn't pass them up. I called and doublechecked, and was told that the casing's speed ratings are retained. The only gotcha is the warranty is null and void if you air them down. Like if you're wheeling. I'm willing to give 'em a shot for the $$ difference, especially given the lack of negative reviews.
Given how capable my K5 Blazer was stock, and the good things I'd heard about Toys, I figured the first thing to do was to take it out and see what it was capable of.
In addition, I'd moved to a new area and didn't know what the terrain would look like. Did I need lockers, or was it pretty straightforward?
Also, I need to consider the dirt. When I moved to Oregon, I had 32" BFG ATs on the Blazer. My first trip out, I couldn't cross the clearing since the clay was so slick and gummed up the tread. It was fun sitting there blipping the throttle and throwing mud, not going anywhere fast, but was not a good combo for many trails up there. However, I grew up in the desert of Arizona, and ATs work great there. What would I find in the SoCal area? Well, I found clay and mud. So MTs are definitely on the parts list.
Before this trip, I had 225/75R14s. No way were those going offroad very far.
While searching Craigslist, I scored some 245/75R16s (appx 31" tall) off a 2010 Toy. However they're Dunlop AT20s, so tread pattern was very street friendly. On a wet day like when we went out, that made for poor traction. The tires wouldn't be long-lived, but I did want 16" wheels.
This was my first real 4-lo wheeling experience with this truck. I was excited!
Overall, it was very educational. I got to meet some new folks (from the BeachNToys San Diego Toyota club), drive a new, exciting trail, and figure out what needed to change on my truck.
Pinyon Canyon starts right off of S2 near Highway 78, on the way to Ocotillo Wells ORV park. It is not an ORV area, and vehicles must remain on the roadways.
The first thing I found was that ground clearance was in fact decent.
The next thing I found is that having a narrow rig sure is nice. But that if your tires don't stick out a bit, you still scratch the paint.
The first real obstacle is The Squeeze. Legend has it someone has taken a fullsize Dodge through here with no body damage.
Looks good from here. Keep going! (it's raining, which makes it even more fun!)
I should have been more right (left in the pic)
Here the door lock is getting "offroad-buffed" by the rock wall.
And now the bumper is earning its keep as I drag it over some rocks. This short section here dented the bottom of the rear tube. It's a Smittybuilt rear bumper (and front) but it's not very robust.
I didn't get through unscathed, but I was far from the damage award winner on this section. Sorry, no pics of that!
The next tough section is this rock that overhangs the trail right at window-height, with the trail crossing some rocks that put your flex and lockers to work. I don't have either, so I got strapped through it. There's a lot of glass on the trail under that rock. Unfortunately, I didn't get pics, so I'll need to go back! >:)
One of the drivers went at it with too much exuberance and added to the glass on the trail, smashing out his driver's rear glass on his shell. Ouch. No pics of that either, he was having a bad day and I didn't want to add to it.
Right after that section, is this part. The 4Runner, she would go no more. At this part, I started to get a little frustrated with the 4Runner. My '88 K5 Blazer, stock, would walk have walked up this (locker in the rear, stock). The 4Runner made it to here, then lost traction to the left front and right rear. Nothing but air. With traction aiding devices, she was done.
Once again, here comes the strap. Greg was real nice about it all day, with his FJ.
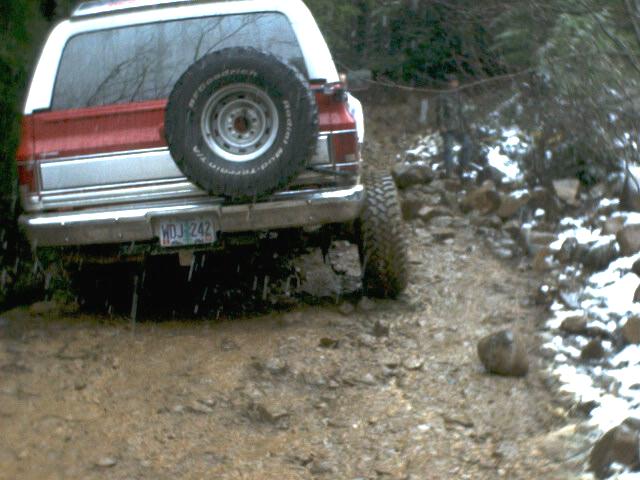
As you can see from this pic, it doesn't take much to run out of flex on a stock 4runner (with newer tires!). The LF and RR are in the air or barely touching. No more forward progress...
Fortunately (really!), someone brought their rental Jeep out on the trail. Same size tire, similar street tread. And same problems in the same places!!! Trail Rated? You decide! ROTFL
The blue toy is running 35s, a Marlin doubler, etc. It didn't know it was supposed to be struggling!
After that, you go down this little hill called Heart Attack Hill. It looks far more imposing in person. Once you drive it, it's no big deal.
Don't let that fool you, one screwup and it's bad on this hill. This gal apparently broke her back during a different trip. Lots of things went wrong here. She starts down the hill around 1:15 into the video
By the way - even though you're going 5mph, wear your seatbelt.
I'd seen the video, so know which line I didn't want to take in a stock truck on slippery street tires with no flex and an automatic (hinders compression-braking down things like this, even in 4Lo).
At the same time, I'd seen the videos of people driving up this hill too (and would have likely tried in one of my last two!).
This section is a controlled crash with limited flex and street tires. You don't get to choose exactly where to stop.
By this point, all 4 wheels are on the ground again and life is looking longer. LOL
Look at that rear wheel - suspension travel is important. Notice the passenger seat is empty? Andrew and I decided it was best if he walked. And, yes, I'm wearing my seatbelt!
Here's the group at the bottom of the hill, after no exciting moments. :)
Lunch break!
It was a beautiful day. The rain had cleared, the ground was wet, and seasonal streams were running.
After that, it's more cool road/trail, then this. Once again, a strap came to several of our rescues!
Here's the blue toy once again just cruising up things
Notice a difference the wheelbase and flex (and line!) makes? :-D
This is what I looked like (but not me). This is a RHD diesel truck. Man it's cool. No lockers, though, so he got strapped too. That's me standing in the pic.
I wasn't brave enough to try this line with the 4Runner (plus he's locked at both ends). No traction, no lockers... Strap please!
I'm standing by the rear bumper in case an extra 250# helps keep the rubber down. LOL
Quite a bit more driving and you come out to Fish Wash. Just past here, there was running water in the wash, and Wind Caves. The caves are apparently popular, lots of people drove up the wash (easy, but 4WD required in most conditions because of the sand/mud) to go there.
I need to go back and see what those are.
I shamelessly have stolen this pic from one of the other guys to represent it as my own as we didn't take any
This was a great ride and I wish we had had more time to explore more of it.
The water out there appears to be highly mineral-rich. Where I took the paint off the wheels and bumpers, the metal started to rust a fluorescent orange within days because I was lax in washing the truck (I was just happy to have it dirty!).
My super thanks to the BeachNToys gang for putting up with our truck on there. Granted, no one thought I'd have a problem, but that's 'cause their trucks are so awesome they didn't realize a stock vehicle was a no-go.
I got to meet a great bunch and have a great time and can't wait for the next run - with a slightly more capable truck!
One of the challenges of building a 4x4 is where to start.
This Toyota is my 4th offroad truck.
My first was a 76 International Scout II. It was orange with a white top. The 345, 4 speed, Dana 44s and a well-worn TracLoc in the rear that was useless just about everywhere. The engine was heavy-wall cast and weighed about 900#. Mud and this truck were not friends. But you couldn't dent it, and you didn't care if you did. It did OK offroad, but I never lifted it and clearance was the biggest issue. And mud.
Eric's 88 K5 Blazer on Little Rubicon in Tillamook State Forest
My next truck was a K5 Blazer. It was quite capable bone stock. With a Gov-Loc in the back (limited slip/locker combo), it's really a 3WD when you move the short lever in the 4wd position. Throw on some good tires, disconnect the front swaybar, and it happily went a lot of places most stock trucks struggle through. When driven properly, a Gov Loc is pretty capable. I've also blown up a couple. Mid- and late-80s Blazers, like mine, came with 28 spline axles with c-clips. That leads to moments like this. :)
My next truck was a class 1700 JeepSpeed Jeep Cherokee. The cage was set up to seat 5, and it went through the dash down the a-pillars. Just awesome. However, I learned that I didn't like having all my rear cargo room taken up by cage and shocks. This was during the tech bubble, so I had a little bit of coin to throw at it and was able to get it all done at once. Dave Turner Motorsports did the work, and they did a fabulous job. All welding was TIG, etc. Really well done. It worked great and we did race it. I wish I didn't have to sell it because it was so capable. But we never really bonded, that truck and me. It was super cool and ultra fast. It ran PRP seats and nets, BFG MTs (still my favorite), Deaver springs, Bilstein 9100s and air bumps, etc. Desert Mike at Kartek provided much of the hardware that went onto the truck.
Now I'm onto my 4Runner. I've always wanted one. And, so far, we've really bonded. I really like the truck, even though it's noisy, it vibrates (Total Chaos solid motor mounts), it's loud (the muffler has got to go), it's slow (intercooler, where are you!?), and it doesn't wheel very well stock (as well as a stock 2010 Wrangler at least). How's that for funny? In some ways, I really like it better than the Cherokee - which was far more urbane, comfortable, had better handling, and was faster. But the 4Runner is giving back about 17mpg with 32" tires on it and an automatic. On this ethanol crap we need to run nowadays. That's pretty cool.
We spent beaucoup $$$ getting an engine rebuilt so it would run the same or worse than it did when I bought it with a huge exhaust leak, 212K miles, a nearly non-working turbo (very, very little boost), and stock exhaust. The shop I'd been using is telling me this is how these turbos run. Repeatedly.
At lower RPMs at 4.5 PSI boost (more than when I bought it), it ran worse than when I bought it. It really had not run better, and would hardly do 80, just a smidge better than before I brought it in.
Some sleuthing around and learning had me convinced the cam was retarded. The shop had "checked" and said it wasn't off a tooth. Errr, but was it retarded?
I'd sent off the dyno chart to a slew of shops in the San Diego area, with the offer to bring them my problem if they could tell me what it was. I got a lot of interesting responses, but only a couple diagnosed it as likely a cam retardation problem or possibly an overly aggressive cam (all focused on peak power). Most others wanted to throw more ignition timing at it. Errr, the dyno shop already did that folks!
Convinced it was the cam, I ordered one from DOA Racing. It had a lot of great reviews all over the place.
Since I was tired of spending $$, and it was just a cam, I decided to do it myself. Sure, I'd likely get it reimbursed by "The Shop", but "likely" might involved court this time, and I really wanted to tear into this thing myself.
Scott, my ultra-cool mechanically inclined neighbor came over. He has a 350hp VW-motored buggy and used to rebuild and maintain 16 cylinder methane-powered engines. Not a bad guy to have in your camp. I'm no slouch, having rebuilt a couple motors and trannies, etc., but it's not something I do every day. :)
Before installing the cam, I degree'd the existing cam. It showed about 7 degrees retarded. Yeouch!
The Crane Stage II cam is not a turbo cam. And, as I'd mentioned, I found enough complaints about lack of power and running rich for the Crane Stage II cam in normally aspirated applications, I was just happy to get it out. I really, really resist spending money chasing problems without having confidence the $$ being spent will solve the issue. I really did my homework on this one, and I was feeling good. Not always a good sign! LOL
Input from folks was that a 105 degree centerline cam in an automatic wasn't exactly a good match. Now, granted, the AT is not intended to be in there for too much longer, but whatever - once the truck is running down the road, AT or MT doesn't matter. And saying this one didn't run down the road none too good was being generous.
The new cam from DOA Racing is a 110 degree centerline.
When I held both cams up (Crane Stage II, supposedly, and the DOA 270) with the dowel pins at 12:00 the Crane's lobes were further counterclockwise than the DOA's. There's that 5 degree difference... Maybe more.
Old Cam specs from my invoice: New Cam specs
Cam specs Int Exh (SWAG from the writing on the box)
Valve lift: .429 .442 .432
Cam lift: .275 .283 .271
Duration (SAE)
Valve lash .012 .012
Centerline 105 105 110
Spread 110
Timing events @ 0.050
Duration 224 234 226
Rocker ratio: 1.56 Same (same rockers)
This was probably the easiest cam I've ever done. The only reason it took as long as it did is that I was messing around with the degree wheel and finding where the original cam was phased. I loosely followed these directions. I was worried about the head gasket, but I had quite a few people, including some really respected names in Toyotas, tell me as long as I didn't break the seal, I was good.
Years ago, I replaced a head on my mom's 22RE, and I remember that sucker was sealed pretty well to the block, so I got over it and bit the bullet!.
I installed the new cam, slathered in cam lube, and degree'd it. It came out to 3 degrees retarded. None of the degree wheel stuff was touched in between cams. I'm wondering if the Cranes are being misdrilled...
After the initial valve adjustment, it was... The Moment of Truth!
I'm used to Chevy's where the distributor spins 360 while you get it started, then you adjust it as needed so the wires and/or vacuum advance (for oldies) points where you want 'em to AFTER you break in the cam/motor. On the Toy, the distributor has a limited swing and you need to stop, pull the cap (2 small bolts), pull the retaining bolt, rotate it, replace the cap, replace the bolt, and see how you did.
It took me three tries to get the distributor where I wanted it. :)
The first time, I had the ignition timing way off and when I cranked it over, it fired as one of the pistons tried to come up, nearly stalling the poor starter. D'oh!
Off with the cap, pull and rotate the distributor a bit, try again. It started. Checked the timing and it was still way off. I had to pull the distributor one more time to get it where I wanted and so it would time well. I set it to factory specs (jumper the check pins!), 5 degrees BTDC, for now. It's going to a shop to get tuned on the dyno, so I'm not too worried about that part right now.
After 20 minutes for breakin, I let it cool down a bit while I cleaned up and put most of the tools away. If you put them all away, you'll need to get them out again. It's just the way it works. ;-)
The first thing I noticed was that it fired RIGHT up. That was an improvement.
It idled much more smoothly. That was an improvement. Especially given the solid motor mounts
At idle, it no longer felt like it wanted to die. That was an improvement
I got in it and went to back up. When it leapt backwards, I started giggling like a schoolgirl. That was a huge improvement.
On the road, it made boost before I reached the STOP sign. That's 3 houses in suburbia. That was a definite improvement, especially considering I wasn't trying. After all, it had a new cam for cripes sake!
On the main road, I realized I was effectively driving a new truck. Holeee Carp! I've never had a single, relatively cheap performance mod make such a tangible difference. And this was with the cam 3 degrees retarded still!
The old truck was a danger to pull out into traffic.
This one throws itself out there in comparison. It's not scary anymore, that's for sure.
The old truck would absolutely NOT spin a tire in dirt from a dead stop (with puny stock 225s no less!).
The new one throws dirt merrily. Then the turbo kicks in and it gets a little angry as it throws dirt. LOL
You all saw the dyno chart I posted earlier. The original behaviour makes perfect sense with that graph. I'm excited to see what the chart looks like now!
Several days later, I got to drive it 50 miles to Temecula. There are some hills between here and there on the highway where even SWMBO's 283hp Suburban wants to shift out of OD. Not the 4Runner, nopers. OD the whole way (Econo mode).
Before, 80 had the poor thing working its guts out (at 4.5psi boost). At 9psi, it still wasn't exactly happy at 80. Now 80 is just some number on the way to a higher number. >:) Time to replace those 10 year old rear tires!!!
In summation, this is the best money I ever spent on a performance mod. It probably wouldn't have been so phenomenal a difference if the Crane cam hadn't been such the wrong choice for this application. But I'm definitely high on DOA camshafts right now!
Next up, taking it to the new shop to get tuned and see what else is Not Quite Right...